Thursday, November 7, 2013

Mockup

One of the advantages of rebuilding instead of starting from scratch is having enough track, buildings and cars to mockup some ideas. Sure, I have to scrap glue off the old bemchwork tops and I am sure the turnouts and tracks will be a little tricky as I reuse them but look at what I mocked up last night.
Looking west, closest track goes to staging, middle is the mainline and the inside track is the yard lead
I realized the most challenging arrangement will be the Irwin yard. How big is enough and can I fit it. I laid out some track last night and think I have a workable plan. This arrangement is close to the Idea Plan yesterday and not too different from Bruce's plan as he has pointed out.
Looking north, the right side of the yard area has, from front to back, an engine track, RIP and MoW tracks and a double-ended cabin car track - some thing that was missing from the old layout.

Engine, RIP, MoW and Cabin car tracks form the right side of the yard
The left side has the 4 track yard. As you can see, the 4th track has space for 7 cars which should be pretty good but I need to confirm the interchange track with the yard, the yard lead and the rest of the layout can support 6-7 car trains with an engine and cabin car. Mostly I expect 4-6 car trains for the traffic flow.
Four track staging yard

Tuesday, November 5, 2013

Idea Plan No. 1

A couple of weeks ago I took the family to the Cincinnati Div 7 show and picked up several items, including the PRR Facilities Book Vol. 10 which covers the PRR route through Irwin and surrounding areas, the center of my layout desires! Last weekend, Bruce and I went to the Dayton Div 3 train show which is always great and I got a pack of Virginian & Ohio (V&O) switchlists that Al McClelland signed for me. What a treat! Al's writing about the V&O operations - and works by Tony Koester, John Armstrong, and Bruce Chubb - are why I love to "run trains".
With those two events as inspiration, and finally getting the benchwork temporarily set up for generating ideas on what is and is not feasible, I began doodling. Below is the first "idea plan". Sort of to scale (I used a scale template) I tried to fit in all my druthers.
Idea Plan #1
Yes too much track, but you have to start somewhere. The curves are 24" but I am willing to go a small as 20". I would like 5-6 car trains plus engine and cabin car (it is 1958 after all) and a 4 track yard in Irwin to sort the inbound traffic. This is the left side of the drawing with a 2 track staging yard that will be hidden behind industry flats. The 3 track Herminie mine is on the peninsula and the right side of the plan is East McKeesport with more industries for switching. Two to three operators - Irwin Yard, Hermnie & East McKeesport, and the "mole" operator outside the track at the top of the drawing.
A start - just needs some ideas and I know exactly who to ask!

Saturday, September 28, 2013

Ramping Up

It's been a busy summer with a lot of travel for work and nice weekends to take our new travel trailer out. I've been thinking about the railroad and what exactly I want to do. First was to decide on the height of the benchwork. I needed to lower it from the previous layout to clear the outlets on the 3 walls, so a couple weeks ago I cut all the legs down 3" from 48" to 45".
Cutting the legs to 45" in the back yard
Also, I really wanted to reuse as many of the modules from the previous layout. I started moving them around a little and hit on a brilliant idea today. I took the two modules that used to be the East and West staging yards and placed them over my modeling workbench. These modules are only 18" deep instead of my standard 24".
Benchwork over my desk is only 18" deep.
After placing these two and a corner 24" deep module, I still have one remaining 24" x 48" module that I used as a peninsula. In the photo below, taken from the doorway into the garage (the door to the backyard is to the far right of the picture), you can see the peninsula and the rest of the layout. Imagine a connector track across the open space and that's the layout - 10' x 10'.
Outside wall, 24" deep by 10'
Now I can place some switches and noodle on a few track plan ideas. Maybe ... possibly... have trains running by Christmas?

Tuesday, March 5, 2013

In between

I always seem to get bogged down when I am in between projects on the layout ... or in this case, the absence of a layout! I still have not picked the final design although I am pretty sure it will basically be the last  design Bruce created.  I don't think there is anything else we can do for MORE space for the benchwork - without going to multi-level which is out - so the next step is to build the benchwork and test laying some track. The two things holding me back from this plan are the small-ish online yard and whether or not there will be enough space for scenery and buildings ... things I cannot really envision until I see the placement in 3 dimensions.
In the meantime, Nicholas, Adam and I have been fixing up the N-scale layout. I ordered some Micro Trains  parts - #1000 Bettendorf Trucks w/Couplers and Micro Trains Line, #1015 Couplers - Assembled - so the loco and all the cars have the same coupler. Nicholas and I sculpted the mountain area and we started to assembly the furniture factory. All things to keep me busy while I figure out next steps on the HO layout.
I did get some "motivation" in the mail yesterday with the N-scale couplers - City Classics, Railroad Street Company House 3-Pack and 10 pieces of code 100 flextrack and rail joiners for when I am ready to lay some track.
Maybe by the next post, I'll have some benchwork and track set up ... or at least a row of company houses!


Tuesday, February 26, 2013

My First NMRA Contest

Last month, I took a couple of flat cars to the local NMRA meeting and entered them in the open loads contest. This is the first time I ever entered a model in a contest and amazingly, one of them earned 2nd place. Not bad considering they had 34 entries which was apparently a record showing. Here is the page from the Call Board newsletter announcing the winners.
PRR 98502 Flatcar with load

2nd Place, Kit

Wednesday, January 23, 2013

In the meantime...

I am been working on a couple little things while Bruce and I finalize the trackplan for the new PRR layout. Over the last couple weeks I was able to stop in T & K Hobby in Bridgeport OH, Hobbyland here in Dayton and found a new store in Annapolis MD while I was there on business. Only grabbed a few small things but very much enjoyed browsing.

Next, I finished cataloging my books and some of the key articles from my magazine collection. So when I am ready to paint figures, weather freight cars, or build a PRR depot I know exactly where to find the steps or plans.

Finally, although its a bit chilly in the train room, I have been doing some work on the boys N-scale layout. Mostly I want to finish something for a change. Nicholas is a little more interested in trains than Adam but occasionally I can get both of them involve. We plaster coasted the extruded foam hillside and tonight Nicholas and I painted it an earth tone. Tomorrow we'll try placing a couple of rock castings and maybe plant some grass. Then we can complete some of the buildings and lay the road through the town.

Not sure if I am quite ready to tackle pouring the water!
Nicholas painting the hillside

Wednesday, December 26, 2012

Layout height

The past few days, I was able to finish a couple of small projects including completing the sky fascia covering the lights and organizing some of my storage bins. Bruce also dropped by and we talked about some  minor enhancements to the latest track plan (Loop Layout with Peninsula). I am pretty sure this is the plan we will build and it will fill the space. While Bruce is updating his sketches, I am devising the operating scheme to make sure it provides the challenge and entertainment I am looking for in a model railroad.

In the meantime, the next question to ponder and solve is track height. The last layout had the rails about 52" (about 132 cm) off the floor which puts the running tracks at my chest height - very nice for realistic viewing from the side and not top down. Reaching across the deepest section of the layout, about 30", was nearly impossible without the step stool but I really enjoyed the perspective.

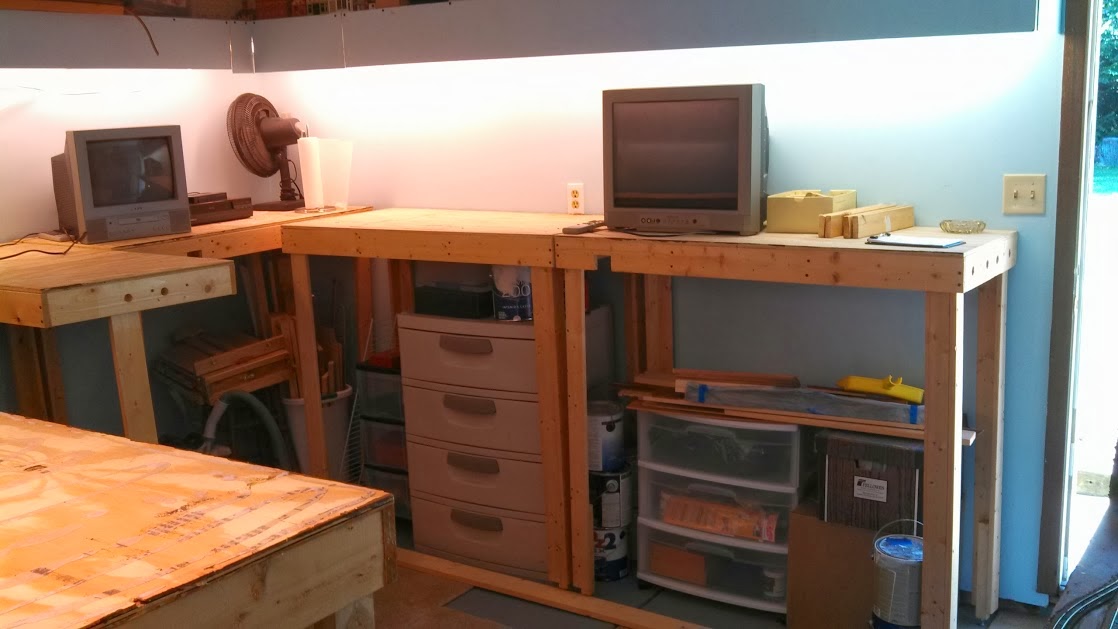
Unfortunately, in the new train room this puts the layout at exactly the halfway point on the three electrical outlets and the one light switch. So I have 3 options:

  1. The height I prefer with notches to access the outlets and buildings or scenery to hide the wires, 
  2. Lower height to clear the outlets but still rely on buildings and scenery to hide them, or
  3. Pay an electrician to lower the 3 outlets and possibly wire them to a new 2 light switch so I can separately turn off lights and the track power from one convenient location.
Left is preferred rail height of 52". You can see one of the outlets 1/2 covered behind it
Of course, the smart thing is to do the right thing and don't compromise, which means option 3. No idea how expensive this would be nor how much work it would entail but it's the right thing to do. In the meantime, I seem to have a couple of pieces of track lying around, time to push some boxcars!